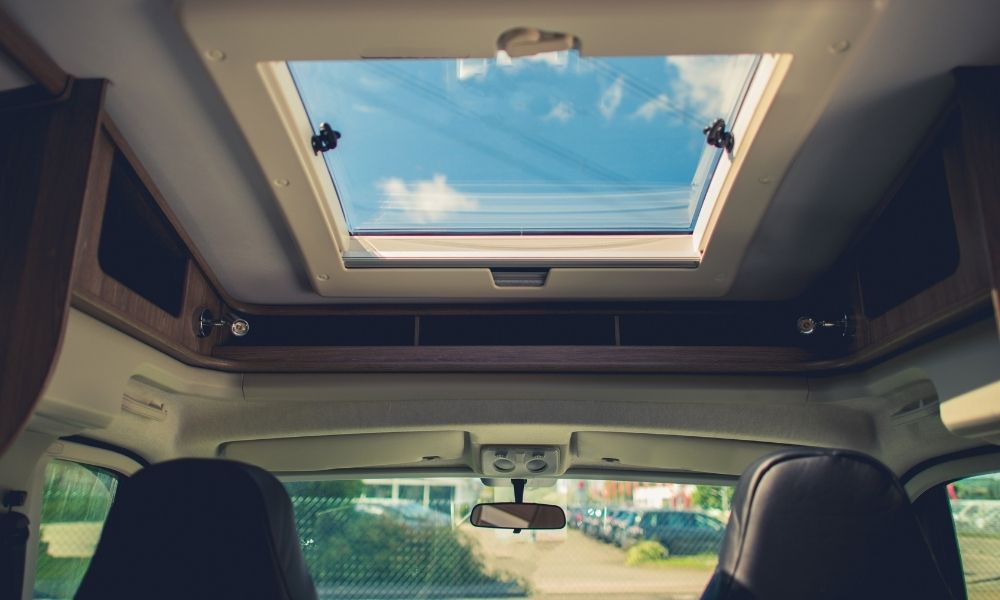
As you look around your RV, you may spot areas that need a bit of maintenance or ways to optimize life in your mobile home. An addition like a skylight adds natural light, improves ventilation, and even adds an emergency exit to your RV. In this guide to installing an RV skylight on your own, we’ll cover the essential steps and more!
Reasons To Install a Skylight
Before diving into those must-know installation tips, let’s talk about reasons to add a skylight to your RV so you can rest assured knowing this DIY project is worth the time. First, installing a skylight means more natural light, which can make your mobile home feel much roomier. Plus, a skylight offers an overhead view of the sky, which really livens up the entire RV.
Pro Tip
Some also use their skylight as an additional emergency escape. This works great if you’ve got a trailer roof hatch that doubles as a skylight. Give your mobile home some beauty and functionality!
Guide To Installing an RV Skylight
While an RV skylight is a great addition to any mobile home, proper installation and maintenance are vital in preventing leaks and other forms of damage. Like any DIY project, you’ll need to gather the right tools and equipment to simplify installation.
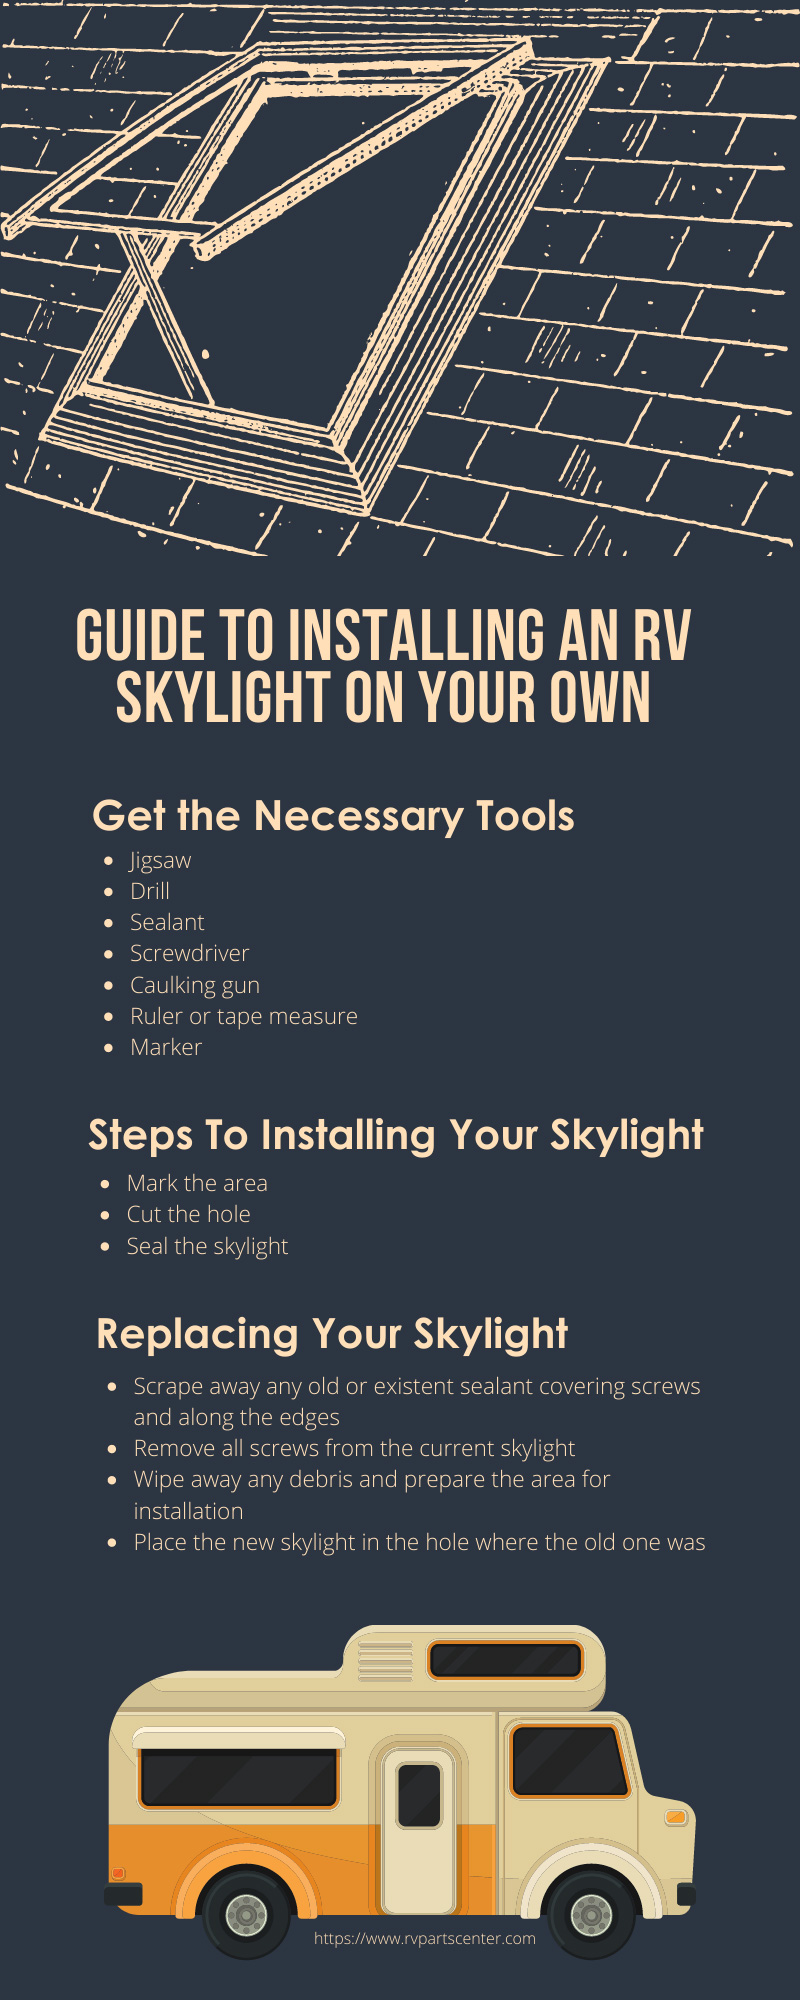
Get the Necessary Tools
Before you can devise a plan and get to work on installing or replacing that skylight, you need to prepare your skylight. As you gather up your tools, make sure you grab the following:
- Jigsaw
- Drill
- Sealant
- Screwdriver
- Caulking gun
- Ruler or tape measure
- Marker
Of course, you’ll also need to order your replacement skylight and have it on hand when you’re ready to begin this project. Check out RV Parts Center for an inner skylight dome. We offer a variety of sizes so every RV owner can find what they need!
Skylight Domes and Covers
The skylight cover is on the roof of your mobile home and helps protect it against the various elements nature has to offer. A skylight dome also sits atop the RV, but as the name implies, is dome-shaped. This shape is popular because it provides style and functionality—you won’t have to worry about leaves or rain droplets lying on it after a storm.
Steps To Installing Your Skylight
Now that you’ve got the necessary tools, it’s time to begin this project. If you’re installing a new skylight, then you’ll need to:
- Mark the area
- Cut the hole
- Seal the skylight
By following these simple steps, you make installation simple and lessen the risk of making a mistake or otherwise damaging your RV.
Mark the Area
Before you start cutting, make sure you choose the appropriate location on the roof of your mobile home, which may require inspecting the roofline. It’s also a good idea to see if the skylight you’ve purchased comes with a template you can trace on the roof.
Cut the Hole
Get things rolling by marking the area for installation to ensure your measurements are precise. After verifying that the marks you made align with the dimensions of your skylight, it’s time to cut the area.
To make cutting a bit easier, drill out the four corners of the square you’ve marked on the ceiling. This makes the task more efficient when you begin cutting with the jigsaw and more precise as you install the skylight.
Seal the Skylight
Once you’ve cut the hole, it’s time to install your skylight, so place it in the cut area and begin screwing it in. The final step is to apply sealant along the edges and screw heads of the new or replacement skylight to prevent debris or water from leaking into your RV.
Many also recommend you check for missed areas once the sealant dries. Additionally, you should check this area once a year to reapply sealant whenever you notice it’s worn.
Replacing Your Skylight
Some RVs already have a skylight, but you may need to replace it over time, especially if it cracks since this could lead to a leak.
To replace an existing skylight, you’ll have to:
- Scrape away any old or existent sealant covering screws and along the edges
- Remove all screws from the current skylight
- Wipe away any debris and prepare the area for installation
- Place the new skylight in the hole where the old one was
After removing the old skylight, you’ll have to place and seal the new skylight as if it was a new installation. Once you’ve screwed it into position, you’ll have to use your caulk gun to lock it in place.
Reasons To Maintain Your RV
For some, an RV is a post-retirement investment, and for others, it’s a way to travel without losing all the comforts of home. No matter your reason for purchasing an RV, preventative maintenance is an important part of ownership since some areas wear down over time.
You should always do a maintenance check before going on a road trip or when you put the RV into storage. For example, plenty of owners keep their mobile homes in storage during the winter months, and if you do this, remember to drain the water systems.
Important Maintenance Tips
If you enjoy a good adventure or two during the winter, you may need to take care of a bit of extra maintenance. Not only should you check the engine and vehicle fluid levels, but also inspect the tires. Anyone traveling north or to an otherwise snowy location should also get snow tires or snow chains to safely navigate roads.
RV Parts Center
As you examine your RV, you may notice some wear or damage in a specific area: locks may no longer latch properly, or plumbing systems may need an update. Whatever the case, you can find replacement parts at RV Parts Center. As industry experts, we have a vast knowledge of RV care and want to ensure owners enjoy every adventure they plan!
In this guide to installing an RV skylight on your own, we covered all the must-know steps to completing this DIY project. Start enhancing your RV with the appropriate updates or by replacing old parts. A skylight could be just what your mobile home needs to fit your definition of perfect!